Product Tips and Tricks
How to Set Up a Billing Schedule in BQE CORE
How to Set Up a Billing Schedule in BQE Core - BQE Software
Time and Expense Billing – How Deep Can You Go? - BQE Software
Let’s say you have an employee who needs to enter time and expenses for a project. You want that employee to enter his or her own time and expenses. Less chance of error. Then you want someone, say a project manager to review and approve the time and expenses. Then you want to analyze and bill it or decide not to bill it.
BillQuick lets you look at your projects, time and expenses as though through a fishbowl from every imaginable angle.
First the employee who enters their time and expenses can only see what you’ve assigned them to. They can also see any jobs that don’t have anyone assigned to them.
This makes the experience easier for the user who only needs to be able to enter time and expenses.
Once the user enters time and expenses they can submit them for review.
It isn’t until this time is approved that it will sync to QuickBooks. When the time is reviewed and approved and then the review tab is closed, then it will sync to QuickBooks.
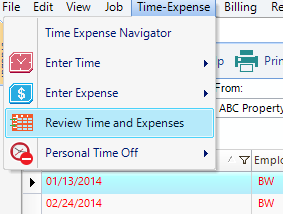
Now let’s look at the time and expense entries, the review process, as well as the job itself and how to access time and expenses from a few different places.
Of course I can go into the review time and expenses. Note the filters – this is where you decide what you can or cannot see.
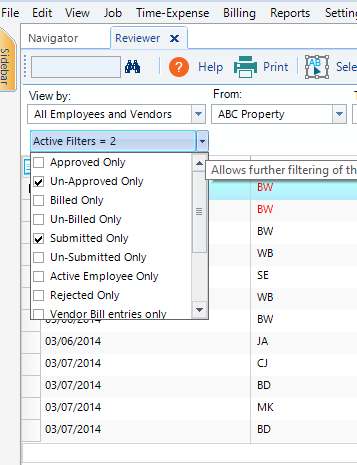
You can see from the indicator at the top of the drop down that there are two active filters. Since you can also see that we have two items in the visible part of the list checked off, it follows that these are the two filters applied. If course you can play around in here and check or uncheck anything you like to see what you can access. This gives you complete flexibility to do anything you need to.
The field chooser lets you decide which columns show up:
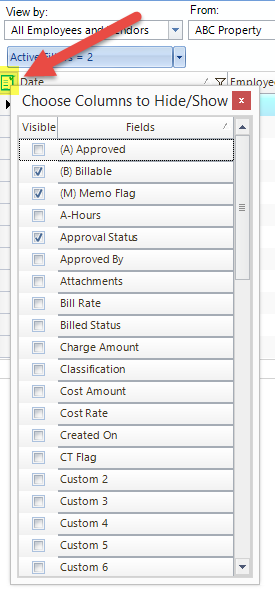
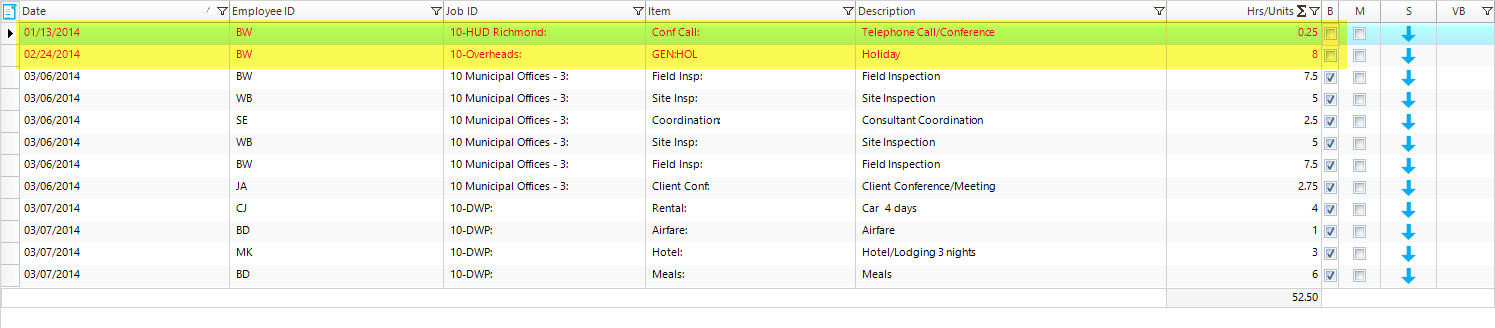
It’s hard to see, but the highlighted box is what I clicked on to access this list. Notice I’ve checked off the billable column to show in the view. I did this hoping to change the status of the line items in red (indicating non-billable time) to billable status.
You cannot do this from this screen, so instead you have to double click the line item. Then you can make it billable from the actual time entry dialogue. Save it, and you will see it updated back in the review screen.
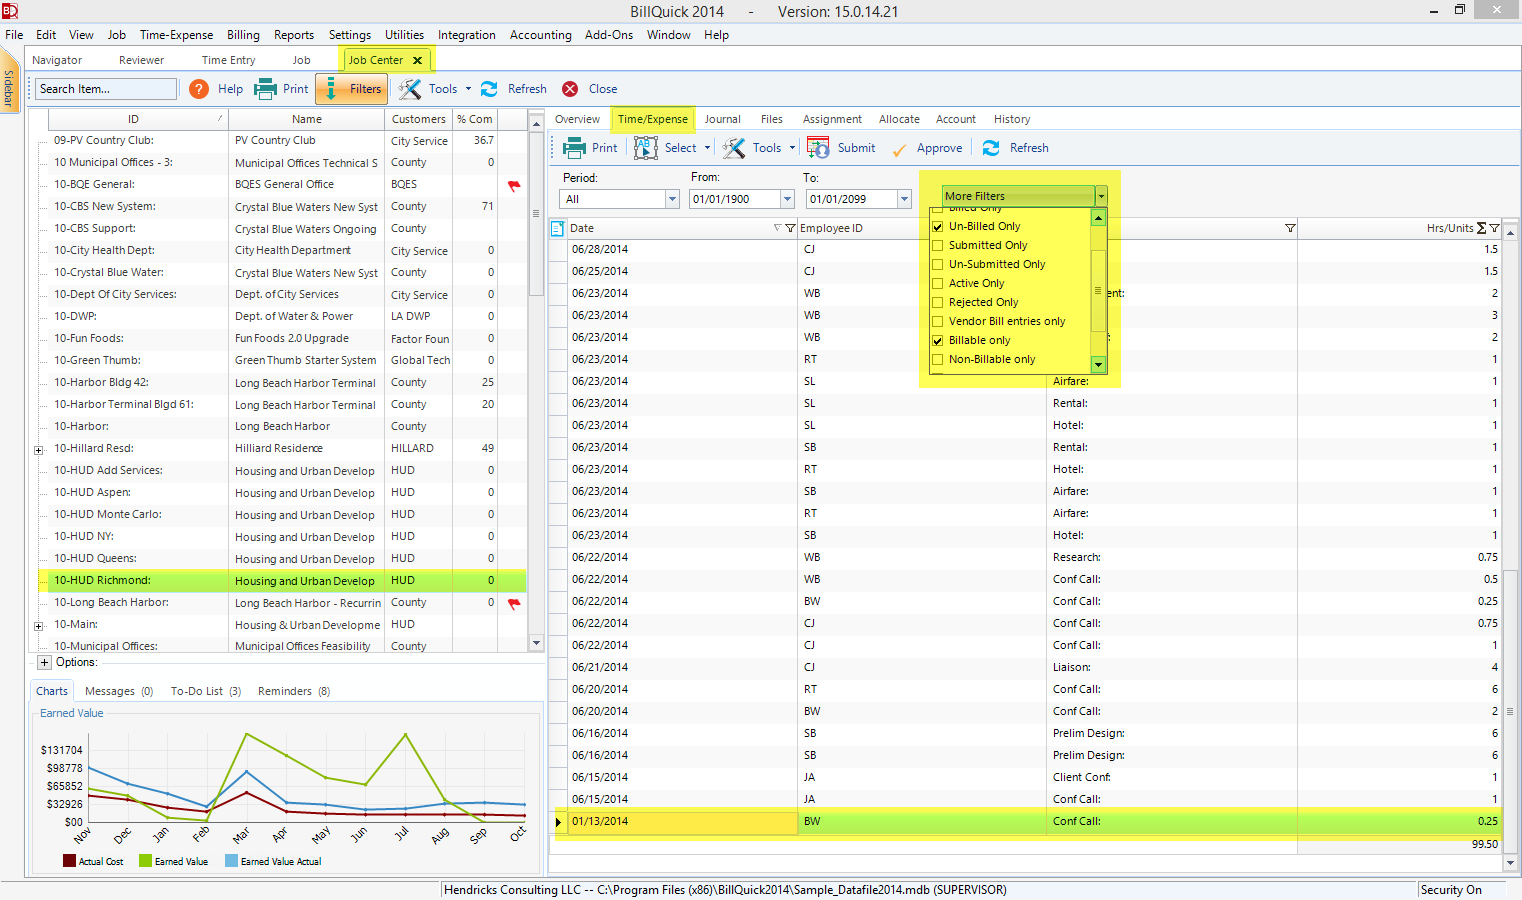
When you double click a line item you will see this:
Note that you are now in the time entry tab, and not the billing review. Check off the Billable option, then click away or arrow down to save the change. Then you can go back to the billing review tab, click Refresh and you will see that it is now billable in the review dialogue.

That conference call was for a job called 10-HUD Richmond.
Let’s go into that job and review all of the time and expenses for that job.
If you go to the job center, select the 10-HUD Richmond job and then set the filters to show “Un-Billed Only” and “Billable Only” then you will find the entry that we just changed from non-billable to billable.
Click for a larger image:
As you can see, the time and expenses on your projects can be accessed from anywhere you need. In this regard, BillQuick is like a giant pivot table, allowing you to see your data from all sides.
BQE University is a hub of brilliant thought leaders in the architecture, engineering, and professional services industry. Each article offers a unique approach to education that emphasizes the importance of developing a business-thinking mindset for your firm. Their valuable knowledge and insights helps transform your business from a mere service provider to a thriving organization that consistently delivers projects that satisfy clients and generate profits. By learning from the experts at BQE, you can build a better firm and achieve your professional goals.
How to Set Up a Billing Schedule in BQE Core - BQE Software
What is Core hr? BQE Software is broadening Core’s reach beyond billing, accounting, time and expenses to improve human resources capabilities.
BQE Core Update Alert: Smart Email Fields and More - BQE Software